
 EN
EN
 AR
AR
 NL
NL
 FR
FR
 DE
DE
 EL
EL
 HI
HI
 IT
IT
 JA
JA
 KO
KO
 PT
PT
 RU
RU
 ES
ES
 TL
TL
 IW
IW
 ID
ID
 VI
VI
 SQ
SQ
 ET
ET
 HU
HU
 TH
TH
 TR
TR
 FA
FA
 AF
AF
 MS
MS
 BE
BE
 HY
HY
 AZ
AZ
 BN
BN
 LO
LO
 LA
LA
 MN
MN
 NE
NE
 MY
MY
 KK
KK
 TG
TG
 UZ
UZ
 KY
KY
 XH
XH
 GA
GA
Installing a ceiling fan can be great way to keep home cool and comfy. It also add some style to room. And if you decide put up ceiling fan by yourself, you saves money too! This guide help you know how to choose right fan and where find high-quality ceiling fans in good prices. With planing careful and right tools, you can enjoy benefit of ceiling fan quick
How to Choose Right Ceiling Fan for Your Space
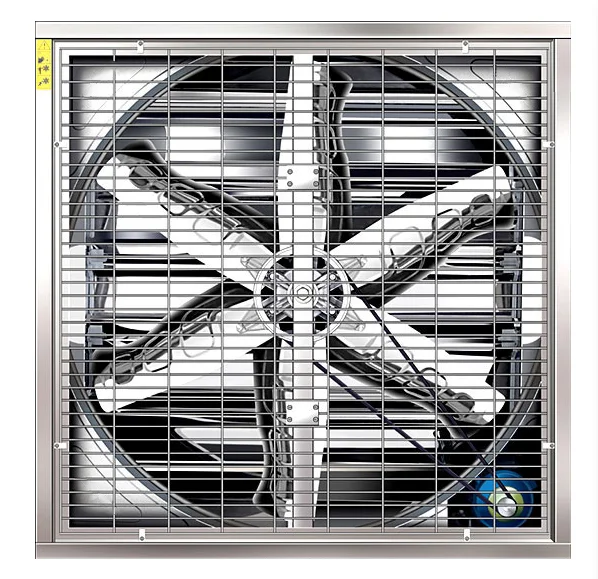
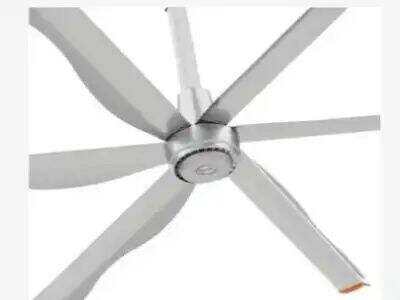
Picking right ceiling fan are important. You wants one that fit good in room and work right. First, think size of room. For small rooms, fan with blade span 36 inches usually best. Medium rooms need about 42 inches. For larger room, go 52 inches or bigger. Next, look at ceiling height. Low ceilings? Flush mount fan is great pick, it sit close to ceiling and not take much space. Higher ceilings can use down-rod to hang fan lower
Also think style of fan. They comes in many designs, colors, material. Modern room? Sleek metal fan might works well. Rustic look need wooden fan perfect. Fan motor is key part too. Get one with good motor that run quiet. Some has extra like lights or remote, make using fan easier
Finally, check air move amount, in CFM. Higher CFM mean more air move, so better cool space. Once you know needs, you ready pick perfect ceiling fan for home
Where Find Good Ceiling Fans at Wholesale Prices
Find quality ceiling fans wholesale price easier than think. Start at home improve stores. They got wide select fans, sometime sales or discount. Or shop online FJDIAMOND. Online easy compare prices. Read customer review to see popular ones worth buy
Local wholesaler good source too. They sell bulk, save money if need more fans. Ask community for good wholesaler. Warehouse clubs also, have fee but savings worth it
Don't forget second-hand. Sites for used stuff has deals on fans. Just check condition good and working, look nice for space
Always watch seasonal sales. Stores big discount holiday or end summer. Be patient, research little, find good fans fit budget. Happy shop
Common Ceiling Fan Instalation Mistakes to Avoid
Instaling ceiling fan fun project, but peoples make common mistakes often. Big one is not turn off power first. Must make sure electric off, or you get shock dangerous. Another is skip reading instructions careful. Each fan has own steps, so follow guide with fan
Sometimes pick wrong spot. Fan too close wall or can't spin free, wont work good. Rule: 7 feet above floor, 18 inches from walls. Use right tools too, wrong size screw driver strip screws. And check ceiling strong enough for fan weight, or it fall
To avoid, take time and double check. FJDIAMOND want you safe, happy with new fan
Best Spots to Put Ceiling Fan for Max Efficiency
Right spot for ceiling fan key to work well. Think room size first. Big rooms maybe need larger fan or two, keep air move. Small room feel too windy if wrong
Hang center if can, blow air even. Ceiling height matter. High one? Longer down-rod lower fan better. Standard ceilings, 8-9 feet off floor best. Over sitting area like couch, so people feel cool air
Avoid near heat like fireplace. Make fan work hard, not good. Blade direction: summer counter-clock wise push cool down. Winter clock wise for warm air. Pick spot right, setup good, enjoy comfy space with FJDIAMOND fan

How Maintain Ceiling Fan for Long Life
Care for ceiling fan important to last long. Clean regular, dust build on blades motor make it work hard. Use soft cloth or duster. Damp cloth for sticky, but fan off and dry after
Check screws blades every months. Loose make noisy or danger. Tighten if wobble. Oil motor year once, but check instruct first, some no need. Remote? Change battery when die
Switch blade direction seasons, save energy keep comfy. These tips, FJDIAMOND fan work good many years, keep space cool cozy